How to limit bandwidth usage in WHM
WHM 11.34 reseller series
27. How to limit bandwidth usage in WHM
This demo assumes you've already logged in to WebHost Manager (WHM).
Now let's learn about setting bandwidth limits for specific hosting accounts in your WHM.
1) Click accounts functions link.
2) Now click limit bandwidth usage.
A hosting account's bandwidth limit cannot be exceeded. When it's reached, the account will stop working until either: 1) The end of the month (when bandwidth usages are reset) or 2) The bandwidth limit is increased.
Every account in WHM already has a bandwidth limit, as it would have been set when the account was created.
Let's go ahead and check the bandwidth limit on one of the listed hosted accounts.
3) Select demo123.com.
4) Click the limit button.
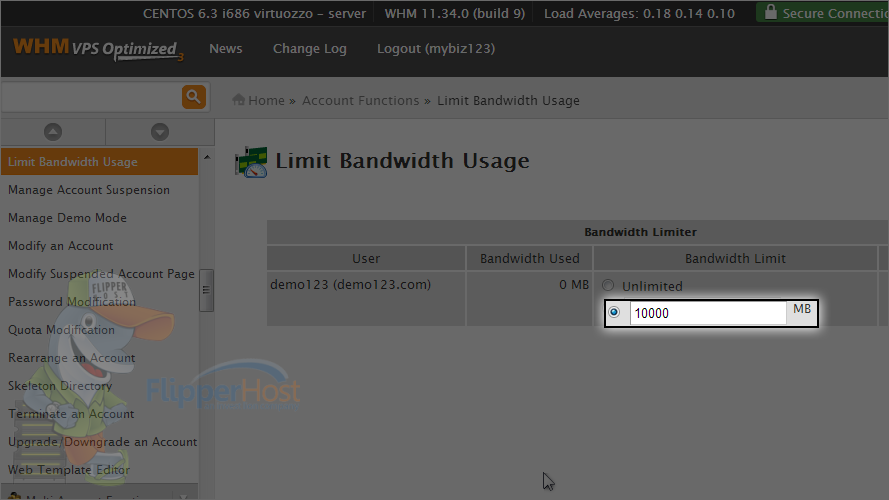
Here we can see that the demo123.com account has used 0 MB (or megabytes) of bandwidth.
It has a bandwidth limit of 10,000 megabytes.
5) Let's go ahead and increase this account's bandwidth limit by typing in a new value here.
6) Click change.
That's it! The bandwidth limit for this account has been changed.
7) Now go to account information.
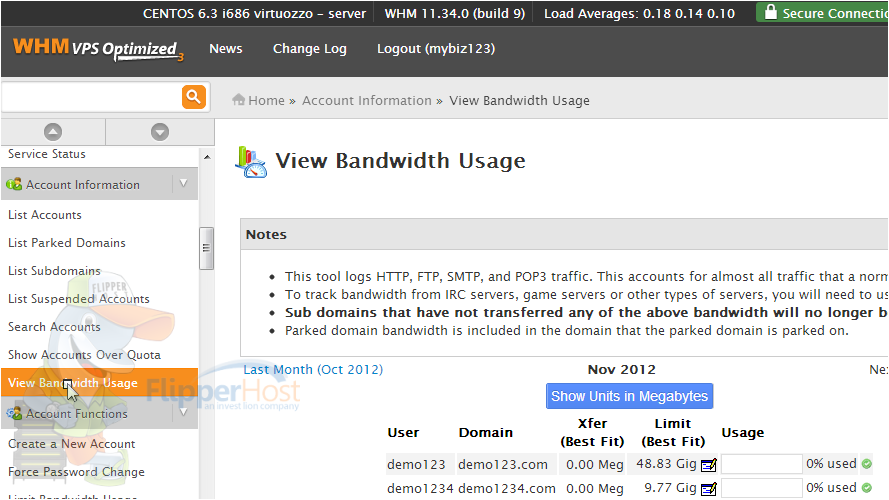
8) Now click the view bandwidth usage link here.
You can see the modified bandwidth we just did here.
From here you can see the bandwidth used by each individual account in WHM.
The amount of bandwidth used is shown in this column.
9) We can click here to see how much bandwidth each account used last month.
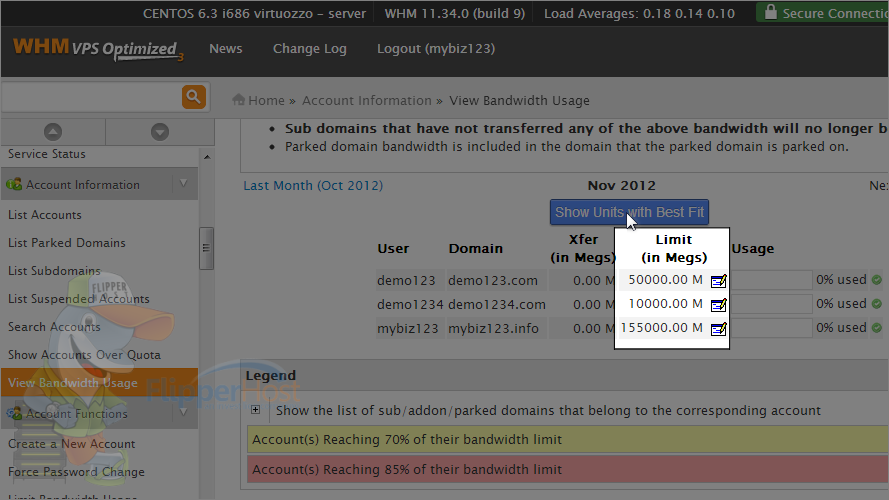
10) Click here to show the bandwidth usages and limits in MB (megabytes) instead of GB (gigabytes).
Bandwidth limits and usages are now shown in megabytes.
This is the end of the tutorial. You now know how to manage the bandwidth limits for your hosting accounts and how to check current and past bandwidth usages.


